Mac OSX Installation Guide
This document will guide you through setup on Mac OSX so you'll be ready to do the course exercises, and optionally, continue exploring Scala after you're done.
Part 1: prerequisites for course exercises
Check your Java installation
Open Spotlight by clicking the magnifying glass icon on the upper right corner of your screen
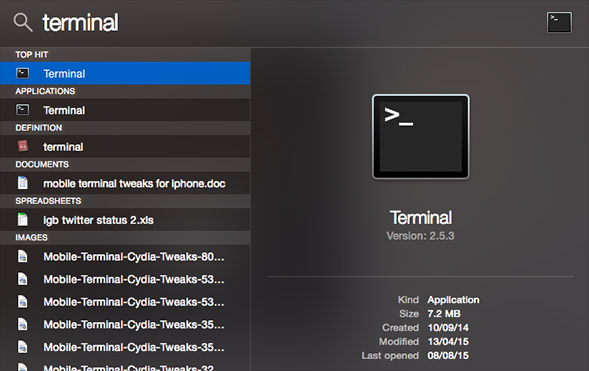
Type terminal in the search box
Click the Terminal application entry to launch your terminal session:

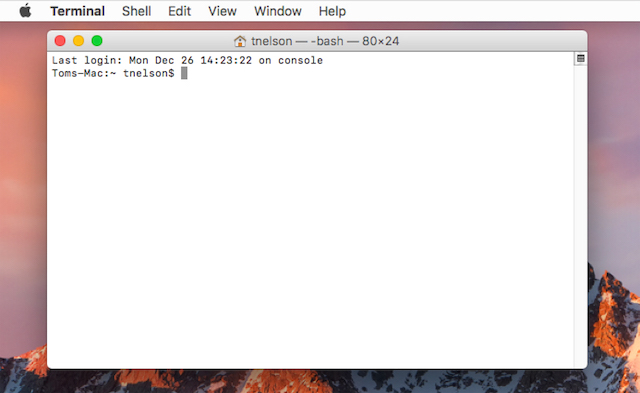
You will see a window that looks like this:

You'll use this terminal window to complete the rest of this installation guide.
Install Java
Recent versions of Mac OS come with Java already installed. Confirm that your computer has Java installed by typing:
java -version
at the command prompt in your terminal window. You should see a response similar to:
$ java -version
java version "1.8.0_20"
Java(TM) SE Runtime Environment (build 1.8.0_20-b26)
Java HotSpot(TM) 64-Bit Server VM (build 25.20-b23, mixed mode)
Note: the $ represents the command prompt. It may look different in your terminal.
You need Java version 1.8 or higher in order to run Scala 2.12. If the version of Java installed on your computer is older than 1.8, use your Mac's Software Update utility to upgrade to the current version before continuing.
Install Doodle
Download the ZIP file here. Unzip the project and navigate inside the unzipped directory (called creative-scala-template) from the terminal. Make sure you can do the following (this will take a little while the first time you do it).
$ ./sbt.sh
.
.
. (you'll see some [info] logs here)
.
.
> console
.
.
. (you'll see some [info] logs here)
.
.
scala> Example.image.draw
An image of three circles should appear!

Part 2: optional Scala and SBT install for further learning
If you wish to go beyond using doodle and create projects of your own, or just play around in the REPL, you will want to have Scala and SBT installed. This section walks you through how to do this.
Install Homebrew
Homebrew is a software package manager for Mac OS. To install Homebrew, paste the following line at your terminal prompt:
/usr/bin/ruby -e "$(curl -fsSL https://raw.githubusercontent.com/Homebrew/install/master/install)"
and follow the instructions in the installation script.
You will see output like this in your terminal:
$ /usr/bin/ruby -e "$(curl -fsSL https://raw.githubusercontent.com/Homebrew/install/master/install)"
==> This script will install:
/usr/local/bin/brew
/usr/local/Library/...
/usr/local/share/doc/homebrew
/usr/local/share/man/man1/brew.1
...
/usr/local/share/man
/usr/local/share/man/man1

Press RETURN to continue or any other key to abort
...
==> Installation successful!
==> Next steps
Run `brew help` to get started
Further documentation: https://git.io/brew-docs
==> Homebrew has enabled anonymous aggregate user behaviour analytics
Read the analytics documentation (and how to opt-out) here:
  https://git.io/brew-analytics
Verify that Homebrew is installed by typing
brew help
$ brew help
Example usage:
  brew search [TEXT|/REGEX/]
  brew (info|home|options) [FORMULA...]
  brew install FORMULA...
  brew update
  brew upgrade [FORMULA...]
  brew uninstall FORMULA...
  brew list [FORMULA...]
...
Install Scala
Now that you have brew installed, you can get the latest version of scala very easily:
brew install scala
Now you should be able access the Scala REPL:
$ scala
cat: /release: No such file or directory
Welcome to Scala 2.12.1 (Java HotSpot(TM) 64-Bit Server VM, Java 1.8.0_20).
Type in expressions for evaluation. Or try :help.

scala>
(note: ignore the warning cat: /release: No such file or directory)
Type
:help
at the scala> prompt to see instructions for using the REPL.
scala> :help
All commands can be abbreviated, e.g., :he instead of :help.
:edit <id>|<line>        edit history
:help [command]          print this summary or command-specific help
:history [num]           show the history (optional num is commands to show)
:h? <string>             search the history
...
Type
:quit
at the scala> prompt to exit the REPL and return to the terminal prompt.
Congratulations! You have successfully installed Scala.
Install SBT
To install sbt, use brew once again:
brew install sbt
To check the installation, run sbt and you will see output that looks something like this:
$ sbt
[info] Set current project to directory (in build file:/path/to/current/directory/)
>